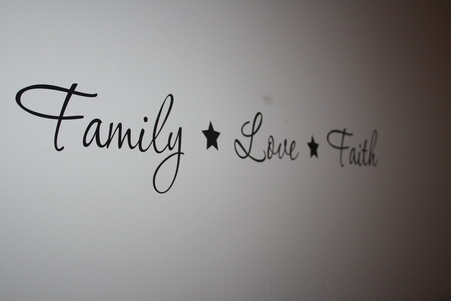
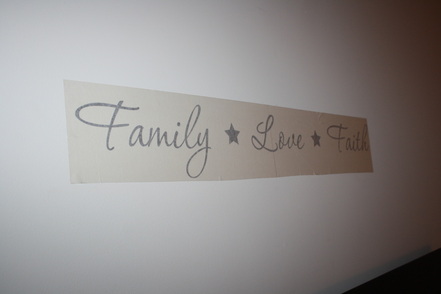
Adding wall decals to any wall whether it be a bedroom, bathroom, kitchen or dining room, gives such a lovely touch and personalization. In the picture above you can see I decided to spruce up my boring old wall space above my bed with this adorable little decal from Decals For The Wall. They have one of the largest selection of vinyl wall decals to choose from! I mean it when I say a large selection... like over 800 and in over 15 different colors to pick from! The hardest thing about these is deciding which to get!
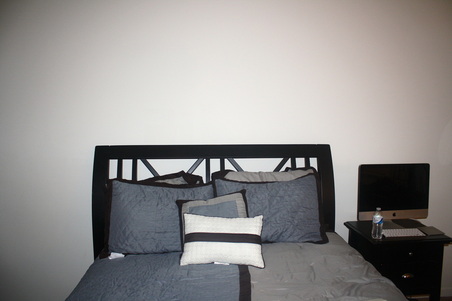
If you want to see how I went from this
before to after photo below, keep reading!
How To:
1. Lay out your design and then decide where you want it to go. Once decided, clean the wall space and make sure it dries. (These can be applied to walls, wood, glass, concrete, metal or and smooth dry area) Also wait 2 weeks before applying if the area was just painted!
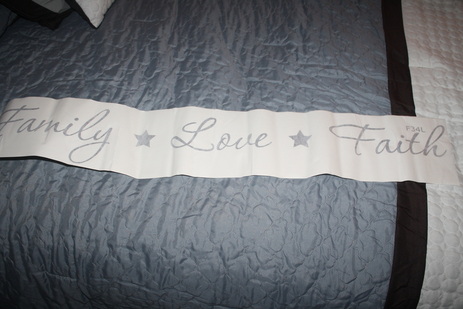
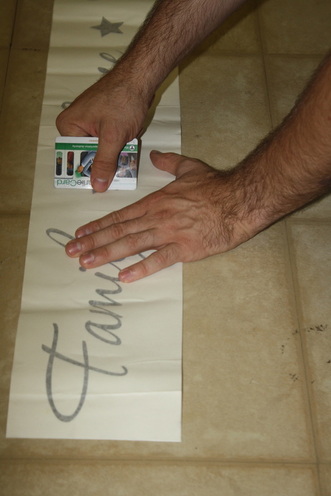
2. Lay down the decal on a flat surface and use a credit card of some sort to rub against the decal to get rid of any air bubbles and help the actual decal stick to the paper better. It reactivates the bond making it stick better.
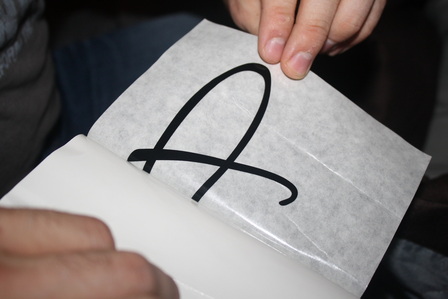
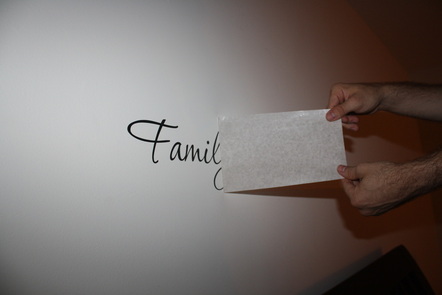
3. Plan where you are putting the decal by using vertical and horizontal lines (or just eyeball it like I did) and start to peel away the transfer tape. Now when doing this, like in the picture below, some parts weren't transferring so I would just cover it again and use my card to run over the areas that weren't coming off and then it started sticking to the right side of the paper again. I recommend you do this part slowly and carefully.
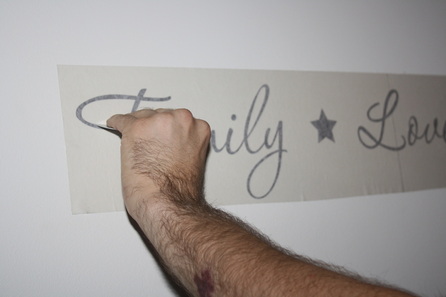
4. Once you start applying it to the wall, use your hand or card to smooth out any air bubbles like shown below. This will ensure smooth application.
5. Now it should look like the photo below. Staying up on its own with the transfer tape still attached. I made sure to run my card along the letters a few times JUST to be on the safe side.
6. Pick up an end of the transfer tape and slowly peel it off the wall. The decal should be sticking to the wall. If you notice a piece coming up, put the transfer tape back over it and run a card along the area and it should be fine. Pull back the tape slowly!
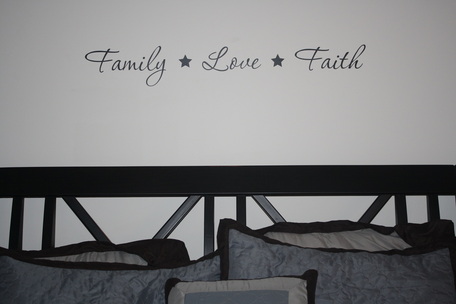
DONE!

This was rather easy to do and finished in 15 minutes. I love the way it looks, it's so cute! I think it's even better then putting a photo or any kind of other wall decor up. The only thing that was kind of a pain was having to keep going back over areas that weren't sticking to the transfer tape with my card, but it wasn't that big of a deal. It's up there now and doesn't look like its going to move at all! Everyone I showed loves it and with all the different ones you can pick from, you can't go wrong.
They range in prices so I suggest you check out their website to get a better idea and see all the options for different rooms. I believe they just peel off quite easily when you are ready to take them down, but they are not moveable in the sense where you can take it off and relocate them to a different wall. So be sure you know where you want it to go! I can update you when I move out of this apartment next year how it was to remove. :)
They range in prices so I suggest you check out their website to get a better idea and see all the options for different rooms. I believe they just peel off quite easily when you are ready to take them down, but they are not moveable in the sense where you can take it off and relocate them to a different wall. So be sure you know where you want it to go! I can update you when I move out of this apartment next year how it was to remove. :)
 RSS Feed